


What to do in your wicking bed this month - May 21
Wicking bed gardening in May
Wicking beds for indoor plants
This blog will focus on how wicking systems can be used to water your indoor plants
With the WaterUps square planter on the market for a few months now, I thought I would try something a little different and write about wicking pots for indoor use. I have been exploring this space for a while now as we have had some interior designers come to us looking for wicking planters for indoor applications. So, I got a few planters of my own and filled them up with indoor shade loving plants that I had previously stashed behind bushes and under trees throughout my garden. I have always had indoor plants, but generally struggled with the watering regime. Even with a dish under my pots I always seemed to flood the place.
The difficulty of watering indoor plants
The problem with watering indoor plants is that with traditional top watering, the water takes time to trickle down through the soil. When it will stop running out the bottom is often anyone's guess. As a result, I would usually let it go too long and then have to carry the poor plant outside and let the water continue to run off and then bring it back inside. If I was lucky, I would remember that day, but more often than not, the pot plant would sit outside for many days and come back in looking worse than when it went out for a water, because some direct sunlight had burnt the leaves. Sound familiar?
So once again wicking was the solution. The WaterUps square planters are actually quite large. I found that I was able to fit two 350mm pots in the one planter with just a little bit of root tickling. In another planter, I was able to fit four 200mm pots creating an instant indoor jungle.
How to set up an indoor wicking planter
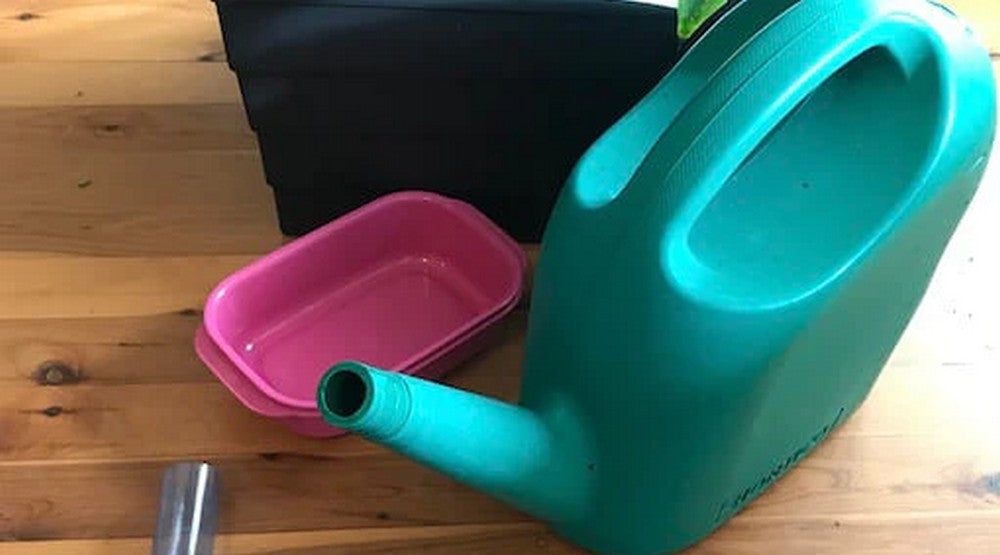
How did I do it? Our pots hold 19 lt of water and 50lt of soil. Once you add a pot plant or two to that, it gets pretty heavy. To see how to assemble your square planter check out Angus Stewart’s instructional videos. After setting up my WaterUps square planters I repotted my plants and topped them up with fresh potting mix. Once I had made sure that all the air pockets had been filled in and that the plants felt secure in their new home, I carried the planters into the spots I had chosen for them. Because the reservoir in the WaterUps square planters hold 19lt of water, I knew that I could happily use one whole 9L watering can to water and settle the soil in without any excess spilling onto the floor. If you wanted to be extra safe just put a small container under the overflow pipe as shown below.

I had three planters to pot up, so I had plenty of time to ensure that the water I applied to the top of the soil had drained all the way through to the reservoir. If you don’t wait long enough - 10 minutes should be sufficient - and fill the reservoir straight away, then you could run the risk of water dripping out the overflow pipe. However, in practise if you put in slightly less than 2 full 9L watering cans you should be fine. One tip I can offer to make filling the reservoir easier with no spills is to attach a 30cm long piece of clear plastic tube to the spout of your watering can. This will give you better control and make it easier direct the water flow to the inlet pipe.
My experience so far with these planters has been amazing. Not only have I seen a level of growth and health in my indoor plants, but it has been achieved with the most minimum of attention.
If you do want to fertilise then use a liquid fertiliser and dilute in your watering can. Remember to place a container under the overflow pipe to ensure no spills. It is best to fertilise when the reservour is nearly empty and apply to the potting mix not the reservoir.
To find out more about the WaterUps Square Planter for indoor plants click here


