


What to do in your wicking bed this month - August 21
Wicking bed gardening in August
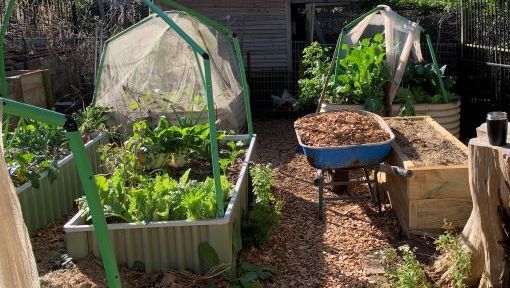
Preparing your wicking bed for spring planting
Spring has definitely come early this year so, wanting to get a head start, I have defied the seed packet scripture and gone out early. Last week I sowed all my spring seeds. I put in a few different varieties of tomatoes, corn, cucumbers, and squash. I used my wicking mat that I showed you how to make a few months back and found the sunniest spot I could on my back verandah. The tomatoes were the first to pop their heads out, and not long after came the cucurbits. The corn is yet to make an appearance, but I will keep an ‘ear’ out for them.
To prepare for the next growing season it is important to make sure that the soil in my wicking beds is ready and settled before I transplant the seedlings. I have found that every time I put a spade down, I chop too many worms, so mimicking the natural cycles in nature, I have lately only been adding a thin layer of compost to the surface when planting.
Topping up soil / compost
You will notice as I do that the level of the soil in your wicking beds in continually dropping. That is normal and a function of the organic matter breaking down, inevitably into humic and fluvic acids. In nature, this organic matter is constantly being replaced and added to, continually building the soil and the life within it.
Unfortunately, unlike in nature, we interrupt this cycle by eating the food that we grow, so it is very important that we return the nutrients that we steal for ourselves. I make this up by composting food scraps and other parts of my garden, like lawn clippings and fallen leaves. Remember variety is important. If composting is not your thing, you can get bagged compost from any garden supply outlet. I am, however, a big advocate of making your own to avoid adding food waste to our refuse bins.
With my wicking beds now the only time I disturb the soil is when I pull a plant. As I get ready to replant, I only have the last of my cauliflower and cabbages to pull out. After I have taken the plant stems, roots and the last of the outer leaves, I give the roots a good shake to keep as much soil in the bed as I can. Any that doesn’t come off will just got through the compost cycle again and ultimately make it back to the bed anyway. I take away all the mulch. I use sugar cane and it can sometimes be reused, but mostly it’s off to the compost pile. I then simply add a layer of compost to bring the soil level back up. It is important to mulch it straight away and give a water-in from a watering can to settle any air pockets out. I plant now while the soil is still wet.
Planting seeds
Whilst I am happy to make my own decisions on when to sow my seeds, I would never stray from the path when it comes to plant spacings. If the packet or punnet says 20cm, then 20cm it is. Most failures I have seen in veggie gardens comes when people plant too much too close. Instead of growing a few plants well, they end up growing lots of poor plants.
Planting seedlings
When transplanting, keeping the soil level the same is not as important with seedlings as when transplanting more mature plants. As long as you don’t go any deeper than the cotyledon leaves and don’t leave any roots showing your seedlings will go on to grow strong.
Part the mulch and with a trowel, make a small hole about three times larger than the root mass of the seedling. Sometimes I find that the layer of compost I have put over the surface is not deep enough to bury the roots. In this instance I will dig in the soil, but only enough to get my roots down. The right tools help. I have been using a hori-hori, sometimes referred to as a "soil knife" or a "weeding knife”. This is somewhere between a knife and a trowel.
Place the roots of the seedling against one side of the hole and gently push soil from the other side across to meet it. Gently squeeze any air pockets out by flattening out the soil around the seedling. Place the mulch back over the soil trying to leave it just back from the stem of the plant.
Stakes or no stakes?
Right now, is when you must stake any plants that need it. The longer it is left, the more roots will be damaged as you push the stake into the ground. This year for the first time I will not be staking my tomatoes! You heard right. This year, I will be using my Flexi Garden Frames to support my tomato plants. The Flexi Garden Frame will not only provide the structure to hang my netting, should the annual pest invasion call for it, but is also a growing support structure.


