What to do in your wicking bed this month - Feb 21
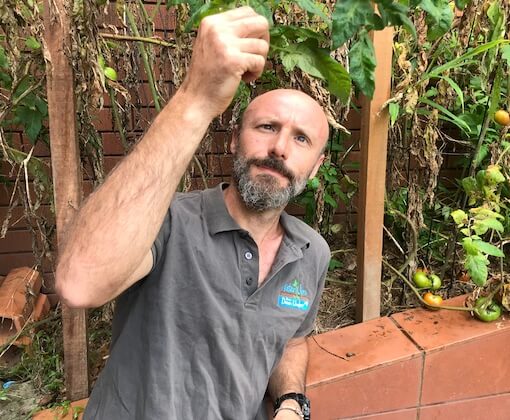
Posted: 10 Feb 2021 by Eric Sturman
End of summer wicking bed gardening - keep or compost?
In this post we will look at some of the challenges of late summer food gardening. Your wicking beds should be producing well but some of your summer crops are probably now getting a little old with problems starting to arise. Its late summer decision time in the garden.
We now find ourselves at the time of year when the summer crops have been producing well, but are now getting a little old and some problems are starting to arise. In this article I will let you know how to get the best out of the last of this summer's crop and if it’s still worth keeping them for a few more fruit, or if it's time to put them back into the earth. Over the years I have found that most gardeners get too attached to their fruiting plants, so explore what to do with them.
Tomatoes
Tomatoes have probably been good to you this year. They have given a couple of fruit a day for the last few months, but now they are looking tired. All the leaves at the base of the plant are brown and withered and the fruit is getting smaller, but there is still plenty of green fruit on the vine. Tomatoes need a reasonably precise pH level (5.8 – 6.7) to perform well and it is likely that if you have been regularly fertilising your crop with organic fertiliser, you may have also lowered the pH. It won’t take much to slightly adjust the pH down by using organic fertilisers as they are typically acidic. Tomatoes will suffer from blossom end rot due to a lack of available Calcium, spoiling the fruit.
Nutrients and their availability depending on pH
 The above chart shows us that the availability of nutrients is very dependent on the pH of the soil, with all nutrients ‘free’ at neutral or just slightly acidic. Move down the pH scale only 1 point and it can be seen that Calcium availability reduces by half. Even applying an ocean full of ground shells will not solve this. It is said to be ‘bound’ or ‘locked’ in the soil and the only way to release it is by sweetening up the soil.
Applying garden lime or dolomite lime at this point would be of no use, as these additives take too long to react with the soil to raise the pH. Liquid lime, or eco-flo lime is a product that is fast acting and should rectify the pH in time to get the last of the crop off the plant.
It’s a great starting point, but don’t assume this is the problem. Always check the pH of your soil before making any adjustments. There are pH meters or testing kits to help determine the soil acidity. If you do find that the soil needs adjusting, only do it in small increments using the suggested application rates. The effects of liquid lime will be fast and within a week your plants will show signs of improvement.
Tomatoes are quite susceptible to diseases. If you want a complete run down on all that you’re up against there are many good websites with all the specific symptoms and solutions, but as a general rule, if the leaves are browning off from the ground up, it is treatable, but from the top down, not treatable. Remove all affected leaves and burn or put into the bin. Do not compost. Spray remaining foliage and fruit with copper oxychloride (available from garden centres). If your plants are looking sick at the new growth, then there is no cure. Lift and destroy immediately. Don’t throw away the fruit though. Tomatoes will still ripen from green, and if they are real young, then you can cook or pickle them. Don’t collect seed from an infected plant, and exercise crop rotation to ensure that the disease which typically lives in the soil, can’t proliferate from season to season.
Zucchinis
Zucchinis are another plant that will eventually succumb to disease attack. In most cases powdery and downy mildew will get to your plants. This is the effect of high humidity and I have found that my zucchinis have grown better, and for much longer in my WaterUps® wicking beds before the inevitable onset of mildew . This is due to the fact that with the wicking bed the top few centimetres of soil are drier without the constant application of water from above. While this has almost eliminated the development of a humid microclimate amongst the lower leaves, rain followed by hot days will eventually take its toll. The leaves will be enveloped in a white dust and the arrival of yellow and black ladybugs and their larvae will start to swarm the affected leaves eating the mildew. Unfortunately, the ladybugs never will never get on top of the problem and this is the beginning of the end. If the leaves are still in good condition and the mildew attack is minor, then starting regular applications of a fungicide will keep the problem at bay. There are many of these readily available from your local nursery or hardware store. If you notice too late, or in the case of this year's tumultuous weather, and it has not been practical to apply fungicide with all the rain, then remove and discard the sick leaves. You will notice that the zucchini leaf stems are hollow. Cut as close to the trunk with a sharp knife without cutting into the trunk. This will ensure that you don’t leave a little vessel for the water to gather and worsen the problem. Don’t tear the leaves off as this will increase the exposed surface area allowing more points for disease attack. Try to make any cuts on any plant in the heat of the day. This will allow the sap to quickly dry, sealing the wound. Remove the leaves and dispose of in the rubbish. There is a point in every plants life when they grow beyond being productive and the decision must be made to remove or revive. If you have made the decision that the plant has served you well enough and it’s time yank it, then still pick every bit of fruit off it that you can. Small fruit, green fruit, it’s all fruit. Check out the zucchinis I picked from a wind damaged plant.
When do I pick my corn?
Corn grows really well in wicking beds but when do I harvest it? Fiona, the gardening teacher at Bondi Public School, suggested that it was often difficult to know when to pick the corn, so we thought that we would share our knowledge with you on this. Corn is an intriguing vegetable. The silky strands hanging out of the top of the cob are inventively called the ‘silk’. Each silk is directly attached to each kernel and as the pollen falls from the flower at the top of the stalk it travels down the silk to fertilise its kernel. As the pollen travels down, the silk dies and turns a crispy brown. This is the first sign that your corn might be ready. To be really sure, peel back the husk to expose the kernels. They should look plump and well formed. Poke or squash a kernel. Note pads out, this is the bit! Three things might happen. Firstly, clear juice comes out. Not ready, but close. Repeat every day until the second option arises. Milky juice! It’s ready, its time, don’t care what your meal planner says, tonight is corn for dinner! All your corn will mature at about the same time, so if you’ve planted 20 plants put that meal planner on hold till next week. If this is you, next time it is a good idea to stagger your corn planting, so you don’t suffer from the dreaded glut. The third and unwelcome option. No juice at all. Sorry, too late. The corn will now be very starchy and no matter how much you cook it; the sweetness is gone. It happens to me a bit, but don’t despair, chickens don’t care. If any readers have questions they would like answered and included in my next piece, please feel free to email me directly at eric.sturman@waterups.com.auEric is a director of WaterUps and has over 25 years experience in horticulture. He loves learning from and sharing his knowledge with others.
-
Posted in
Category_Community Gardens, Category_Garden Wicking, Category_Project Groups>Commercial Projects, Category_Project Groups>Community Projects, Category_Project Groups>Horticulture Projects, Category_Project Groups>Landscape Projects, Category_Project Groups>Residential Projects, Category_Project Groups>School &, ELC Projects, School Gardens, WaterUps Featured


